Easy Homemade Cold Brew
Well it's officially the middle of summer, which means Cold Brew coffee is selling like crazy here at our coffee shop! But if you aren't a local, don't worry! Cold brew, also called Immersion Brew, is so simple to make at home, all you need is a little patience. This guide will get you started with your first homemade Cold Brew coffee and we'll give you some ideas so you can experiment on your own!

What You'll Need:
- Coffee!
- A Container - We used a 16 oz Mason Jar. For a larger batch, use a quart sized Mason Jar and double the coffee and water.
- A spoon - Or really anything to stir with
Optional
- A Scale - if you don't have a scale, we'll explain how to use measuring cups below

Step 1: Coffee!
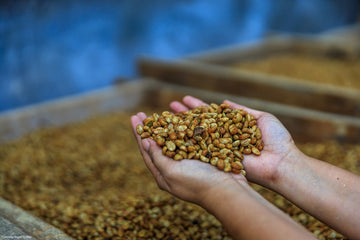
For this guide, we went with a 4:1 ratio of water to coffee. That means for a 16 ounce Mason Jar, use 3 ounces of coffee (by weight). If you don't have a scale, use approximately 1 cup of whole bean coffee. Feel free to experiment with your ratio! Popular ratios include 16:1, 12:1, 10:1, 8:1 and on and on. Get a box of mason jars and try several to see which you prefer! Obviously, less strong recipes will not need to be diluted as much once the brew is finished. Remember that the ice you add later will dilute the concentrate significantly as that's why many folks prefer a more stout brew to start with. Also, a stronger batch means you don't have to make as many batches!
Step 2: Grind!
Grind your coffee coarse, as you would for a French Press. In fact, you can do Cold Brew in a French Press! It makes the final step very simple as all you need to do is plunge the plunger and pour into a final storage container.

Step 3: Stir!
Add the coffee and fill your Mason Jar with clean, cool water. Give it a good stir to ensure even saturation of all the grounds. Now put a lid on it! Seriously though! Next you place the cold brew in the fridge for 12 hours and the scariest place for coffee is the fridge. Coffee tends to absorb surrounding smells and flavors and you don't want your cold brew to taste like week old egg salad!
Step 4: Wait!
Ugh, this is the hardest part. Your cold brew needs 12 hours to steep fully. Feel free to experiment here! Some folks like to leave the cold brew as long as 24 hours to allow for even more extraction. We like to make ours the night before around dinner time and enjoy it first thing in the morning.

Step 5: Filter!
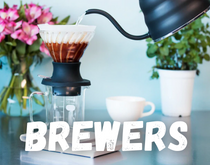
This part varies considering on what you have on hand. As you can see, we used a pour over and filter. You can use a filter and hold it in one hand, you can use cheesecloth and a rubber band wrapped around the lid, the options are only limited by your imagination! Obviously, if you are using a French Press, all you need to do is plunge. Either way, pour your resulting concentrate into another container and store in the fridge (with a lid!) for up to 2 weeks.

Step 6: Enjoy!
As mentioned before, pour your cold brew over a glass full of ice first and taste it to see if it's diluted enough for you. Remember! Cold brew is brewed as a concentrate, dilute to your tastes. As the ice melts, or if you add milk, the brew may reach your desired level of strength. With this 4:1 ratio, we typically use this concentrate diluted to about 60% original strength. To do this at home, just add a bit less than twice as much water as coffee to each glass. If you do a smaller ratio, simply add less water or let the ice do the heavy lifting for you!


