Roasting Coffee in a Popcorn Popper
Roasting Coffee with a Air Popcorn Popper
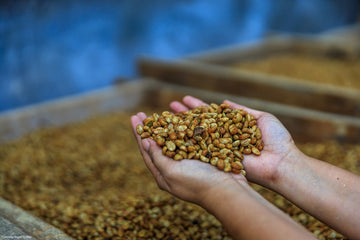
Roasting your own coffee at home doesn't have to be a big, expensive deal. The great news is that you can pick up an Air Popcorn Popper for $~25 or less and re purpose it to roast coffee! You don't need to do any fancy modifications (although a quick web search will show that TONS of modifications are possible if you're really into DIY'ing) and it's super quick. In about 5 minutes of minimal effort, you'll have fresh roasted coffee. Let's get into the nitty gritty.
Your Popcorn Popper

Any popcorn popper with a metal popping chamber and air vents on the side of the chamber (rather than venting straight into the very bottom) will be just fine for roasting coffee. The one we've been experimenting with lately is the West Bend Air Crazy. We picked it up from Amazon for about $25 brand new and it does the trick just fine. Just a heads up: roasting coffee in a Popcorn Popper will void it's warranty with the manufacturer. A small price to pay for such an inexpensive roaster if you ask me!
What You'll Need
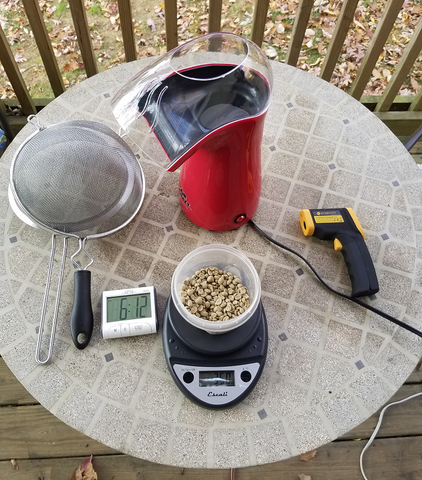
- Your Popcorn Popper
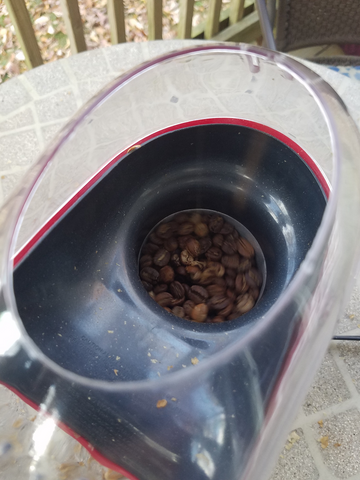
- Green coffee - 3 to 4 ounces is best. We had the most even results at 3 ounces. You can also try 1/4 to 1/3 cup if you don't have a scale.
- Colanders or bowls for cooling
OPTIONAL
- Kitchen Timer - for keeping track of your roast time. You can always use the one on your phone!
- A Scale - As mentioned, not necessary, but more accurate.
- Temperature probe or Infrared thermometer. Great for helping you gauge how your roast is coming along.
Plug it in and turn it on
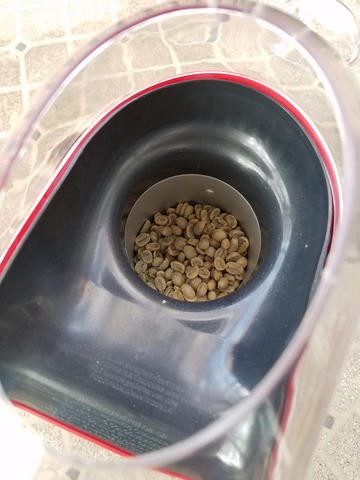
The roasting part is simple. Plug your popcorn popper in and turn it on. Drop your coffee beans in. I recommend roasting outside if possible. Poppers will send chaff everywhere and even with the top plastic piece on (we left it off to allow for easier access), it's gonna mean some clean up for you.
A little help from my friends

Early on the beans may be too water heavy for the air to move them around and provide for even roasting, especially if you put more like 4 ounces in rather than 3. The best way to handle this is grab something long from the kitchen that can handle heat and give the coffee a little helping stir until the air vents can take over keeping the coffee agitated and moving.
Drying Phase
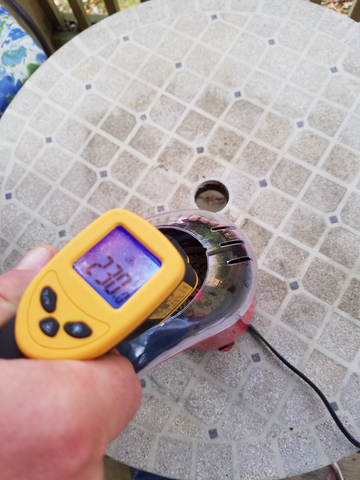
Popcorn poppers roast very quickly, so within a minute, you'll already be in the mid 200's (degrees Fahrenheit). The beans will be very light brown and emitting a grassy, sweet smell. The beans will begin to steam as water is boiled off and the air vents should begin to have no trouble taking over agitating the beans for you unless you loaded too much coffee.
First Crack
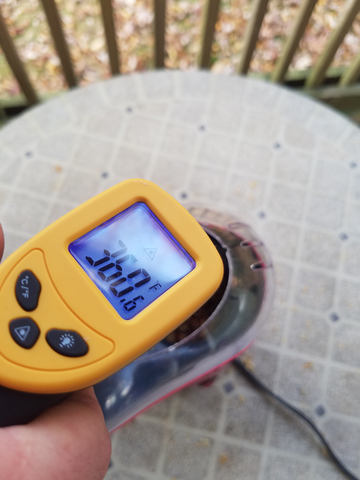
Around 2.5 to 3 minutes in and at 360 to 370 degrees Fahrenheit, you'll begin hearing the light, gentle pops of first crack. The beans will be more "coffee" brown and the smell will actually smell like coffee rather than hay! You'll also see the steam looking a bit darker and becoming more and more like smoke.
Quittin' Time
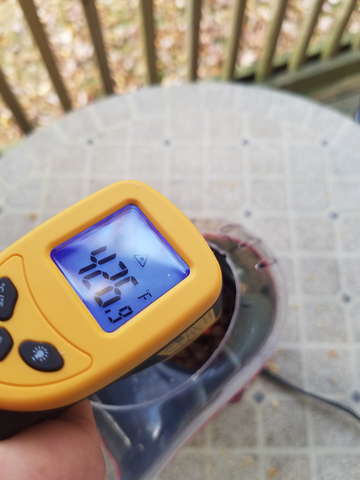
By the time you reach minute 4 or so, you should be around 420 to 430 degrees and you'll begin hearing the higher pitched, rice krispies sound of second crack. At this point you'll also begin to see significantly more smoke coming from your popper and the smoke will smell less sweet and more...smokey.
Pull your coffee early into second crack for a Full City Roast (medium). A little into second crack will be Full City + and a rolling second crack (machine gun pops) means Vienna Roast (Dark). Seconds from that and you'll have French Roast, so watch closely! Always remember that the beans will continue to roast just a bit longer once you finish, so quick cooling is important.
Cooling quick and simple
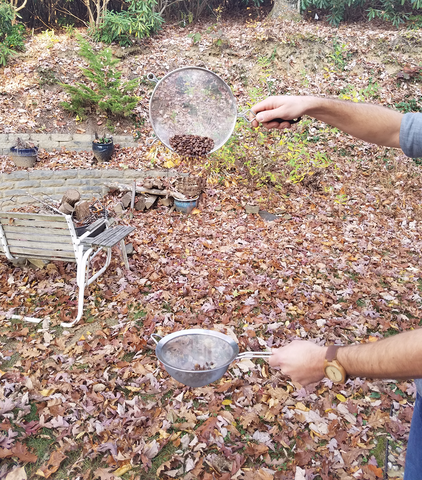
The quickest and simplest way to cool your fresh roasted coffee is to gently pour it back and forth between two metal colanders or bowls. If there's even the slightest breeze, any remaining chaff will float away as well. Continue pouring the coffee back and forth until it's cool enough to handle easily. Store in an airtight container away from sunlight and moisture, preferably in a bag or jar with a one way valve to allow your coffee to de-gas. Be sure to wait 12 to 24 hours before brewing for optimal results!
Final Thoughts
Roasting in a popcorn popper is quick, easy and best of all, super inexpensive. We really liked how simple and plug and play this method is and anyone can do it. Like fluid air bed roasters such as the SR-500, the flavors are very origin heavy when roasted light and there is a tendency to under roast and under develop the beans since the process is so fast. While simpler than our other "budget" roasting method, the Whirley-Pop, the flavors were less well rounded and a bit more acidic, though still very good.
The popcorn popper's quick roast time can be good or bad. Your window to pull good beans before they go from Medium to Charcoal goes by quickly, but after a few batches, you'll be able to anticipate this and listen carefully for the cracks. The very small batch size is also good and bad. Smaller batches means less coffee wasted if you do mess up and more chances to experiment, but if you want to roast a lot of coffee, you're going to be roasting quite a few batches. That being said, 4 ounces is enough for anyone's morning pot of coffee, and being forced to roast fresh all the time is not necessarily a bad thing!
For more on determining your roast level, check out Roast Levels: A Primer.
For more on general coffee roasting, there are tons of articles in our Learning Center!