The Nucleus Link: Tips, Tricks and 200 Grams
The Nucleus Link: Tips, Tricks and 200 Grams
So you've just bought a Link by Nucleus Coffee Tools, or maybe you're considering a purchase. Congratulations! Now what?! Well first, start here with our complete video guide:
I recommend watching it top to bottom at least once so you don't miss anything. Once you get your hands on your Link and get a roast or two under your belt, give it another watch and feel free to skip around a little bit. It's weird what will stick with you once you have some hands on experience with it.
Ok, you're back! But maybe something still isn't going quite right. No sweat, let's go over the order of operations and see if we can't find a sticking point. Feel free to skip around using the Table of Contents:
TABLE OF CONTENTS
2. First Roast & Troubleshooting
1. GETTING STARTED
The first thing you should do when you receive your Link is update the firmware. Otherwise, you won't have access to all the profile packs I mention in the video (Omni, Filter, and Espresso). You'll need to download the Link Studio Software from Nucleus. Go here and scroll to the Download section. Download the version appropriate for your Operating System and install Studio.
Now use the USB cable to connect your Link to your computer and fire up the Studio Software. Once your Link has synced, click the button near the top that says "View Roaster Sync Folders" when you hover your cursor over it. That should open a new window with a tab for "Firmware". Use that tab to update the firmware on your Link and install the latest version to access everything we will discuss. At this point, all the new Profile Packs are available on your Link directly and you don't need to connect to Studio unless you want to. Like if you want to view your logs, make a custom profile or load up a profile someone has shared with you.
Oh, and while you're downloading stuff, go ahead and download the Link App on your phone!
2. NEW COFFEE PROTOCOL
Alright, you just got a brand new coffee (or maybe it's a new harvest season for a coffee) and you aren't sure where to start. Here's the best way to proceed:
Step 1: Density Tube
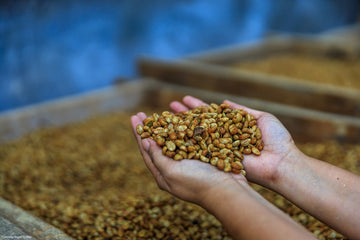
First, let's get a density reading on this coffee. Remove the lid on the density tube and place it on the sampling tray. Now place both items on a scale and zero your scale. Pour your coffee into the tube and over fill it. Give your tube a few gentle taps to settle the coffee and use the tube's lid to remove any beans poking over the top so you have a nice full and level tube. Be sure to remove the beans that have fallen onto your sample tray and check your scale. (watch here to see this process in action). Note the weight on the scale and maybe write it down somewhere just in case.
Step 2: New Sample Entry
Next up, open the Link App on your phone. Use the Fan Calibration if this is your very first roast or if you have taken your Link with you on the road (watch here for how to do that). Otherwise, click "New Sample Entry". Here, decide on a general profile you'd like!
- Cupping: These profiles all have very steep curves, meaning they are hot and fast. Excellent for cupping and for origin flavor accuracy at light roasts (10 to 15% development). Lots of vibrant acidity maintained in the cup, but typically a bit short on sweetness. Expect roasts to end in as little as 6 to 7 minutes.
- Filter:These roasts are longer and more gentle than the cupping curves, particularly in the Maillard phase. They tend to have much more rounded sweetness, though the acidity can be muddled at medium and darker roasts, depending on your coffee. Lighter roasts offer good clarity and balanced acidity. Expect your roasts to last 7 to 9 minutes depending on your chosen development time ratio (DTR%).
- Espresso: These curves are the longest and intended to increase the coffee's solubility. Expect lots of rounded sweetness, but you may have much duller acidity, especially if filter brewed. These roasts can last as long as 12 or 13 minutes!
- Omni: What to do when you don't know what to do! In my testing, these cups landed between the Cupping and Filter profiles in terms of balance between acidity and sweetness. That is to say, they leaned a little closer to favoring acidity, especially at lighter roasts. But if you push the development into the upper ends, you can certainly bring out more sweetness in the cup. Also great if you want to try a different style of espresso with a shorter and steeper roast curve. In fact, the Omni profile has the steepest curve of the whole bunch. Roasts should last 7 to 10 minutes depending on your chosen development %.

Here's a great article from Nucleus breaking down the different profiles in more detail (and updated for the latest release), just scroll down to "Roast plans/Profile packs".
Alright, you've chosen a profile to start with and now you just need to enter in the density of your coffee as well as the remaining details about it. Click "Done" and you'll be given a profile number to start with! Toss that coffee in the roaster, select your batch size and get to roastin'. All you need to do now is select a development time ratio (DTR) % in order to set the roast level. While DTR and roast level do not necessarily line up perfectly, here's a rough guide you can use to choose a starting point:
- 10% Very Light
- 12% Light
- 15% Light-Medium
- 20% Medium
- 25% Medium-Dark
- 30% Dark
IMPORTANT NOTE: The numbered profile (called a power curve) you get from this process doesn't necessarily transfer to other profile packs. For example: let's say you initially selected "Filter" pack and the app gave you profile "208" to try. You roast that then you want to roast an omni version as well. You need to recalculate for that pack in the app. It might give you Omni 208, but it might give you Omni 204 based on the data. That's why I mentioned earlier to write down your coffee's density so you could have it handy to try other profile packs with. Especially going between very different curves like Omni and Espresso, this is an important reminder that 208 Omni and 208 Espresso are very different curves and just because one is appropriate for your coffee, doesn't mean the other is. So use the app for both!
Step 3: Advanced Dial-In
Alright, you've got the first roast of your new coffee under your belt! How'd it go? Pretty darn good? Just ok? Wait, you didn't even get to first crack before it went into cooldown?! Never fear, Advanced Dial In is here! (Oh and if you're wondering more about why that might have happened, we'll get to that too!)
This step is super simple: Open the app and under "Profile Selector" select "Advanced Dial-In". Now select the Profile Pack you just used and enter in the time your roast hit first crack. If you never hit first crack, enter the time the roast ended. Finally, enter the number of the profile you started with (like "208" in our example) and hit "Done". Voila! The app uses this information to feed you a more ideal profile number to try with your coffee.
You can repeat this step after every roast if you reaaaaaly want to absolutely nail the roast to Nucleus's "ideal" perfect roast. You know, Dialing it in! Or you may absolutely love this roast how it is when you cup it. I mean, you are actually tasting your coffee right?. Just remember you need to repeat this process with each different profile pack you use (see Important Note above).
Here's a great video from Nucleus explaining this process if you're more of a visual learner:
Troubleshooting
If you didn't make it to first crack on your first roast, there's no need to be concerned. Let's take a second to understand why the roaster went into cooldown before you heard first crack. Remember that the Link is intended to be able to function fully automatically if you so choose. The purpose of the profile selector is not just to find your idealized profile, it's also meant to use the density of the coffee in order to predict when first crack should occur. It uses this prediction plus the development % you choose to guess when first crack happens and send the roaster into cooldown automatically after that predicted development period as if you had selected it. Obviously, it ends this protocol when you manually mark first crack rather than depending on it's prediction.
But this prediction depends on an idealized coffee in it's ideal state. We know that every coffee is unique, which is great! But all the different variables from origin, to process, to cultivar, to moisture content and more make it nearly impossible for this density predictor to work 100% of the time. Thus, the Advanced Dial In feature! It takes the actual experience of having had your coffee in the roaster and seeing how it behaves while roasting and gives you a much more accurate profile.
So now we know what happened: the app selected a profile that was not hot enough for your coffee to reach it's desired first crack point at the predicted time. That's why if you put this roast end time into the Advanced Dial-in, you'll get a much hotter profile to try (higher power curve = hotter profiles). But how can we avoid wasting that first batch if the first crack prediction is off?
Simple! Increase your development % as high as it will go before beginning the roast. This widens the window for error or time you have to actually hear first crack and tell the roaster to abandon it's automatic protocol. Once you actually hear first crack, mark it and quickly tap the Minus button on the roaster to bring the development % back down to what you actually want. Yes, you can adjust the development % mid-roast!
3. MORE FAQS & RESOURCES
Here's an exhaustive list of all our resources for the Nucleus Link!
Download our exclusive TCC Profile Pack - Try our custom Profile Pack designed in collaboration with Nucleus!
Our YouTube Playlist for the Link - Basics, Navigating Link Studio & More
From Nucleus Coffee Tools
How to use the Link - NEW for 4.1 - Introducing Marv, the Link Expert Roaster Bot! If you have a question and can't find the answer anywhere else, ask Marv first! He's surprisingly well informed.
Addis 4.1 Update - Full Feature Set listing
How to take care of your Link - Maintenance Tips
Nucleus Coffee Tools Training for the Link - YouTube videos covering all Link topics.
4. LINK STUDIO GUIDE
Now that you're a little more familiar with the Link, if you want to keep diving deeper, the next thing to do is learn more about the Link Studio Software! This is where you can really unlock the full potential of the Link's System. Check out our guide here:
5. ROASTING 200G BATCHES
Let's not kid ourselves, I know why you're really here. You want to unlock the full potential of this roaster and double the batch size to 200g. Alright, let's get down to brass tacks.
Important Note: I'd recommend you watch the entire video at least once so you fully understand what you're doing! For the most part, the settings we're changing should not run the risk of damaging your roaster, as long as you follow the instructions carefully. However, my usual disclaimer here when pushing the limits of things - the responsibility for any damage lies with the user.
Important Note 2: The Link System was designed to put accuracy and predictability above all else, including batch size, which is why Nucleus has stuck with a 100g max recommended batch size. However, they understand users will experiment and push boundaries, so as long as batch size over a decrease in predictable results and accuracy is a tradeoff you're comfortable with, they don't have a strict stance against it.
Step 1: Figure out your profile
Just like roasting 50 to 100g, the first thing to do is figure out the profile we want to use. See the steps listed above to get a suggested profile. I would recommend running a first 50 to 100g batch so you have an opportunity to use Advanced Dial-in and get an even more accurate profile. Now that we have a profile, let's CONVERT it to handle 200g batches.
Step 2: Load up your Profile in Link Studio
Open Link Studio on your computer, plug in your Link with the USB cable and turn it on. Once your roaster has synced, View the Sync Folder. Click the Profiles tab and use the drop down boxes to select the profile from Step 1. In this example, we'll use Omni 204.

Step 3: Crank up the Fan
Obviously, we're going to need our fan running much higher to move twice as many beans. Once your profile has been loaded up, go to the Fan Profile Curve tab. We're going to keep these 4 points at the times they already are and simply raise 'em way up. All you need to do is click on a point and use the dialog box at the bottom to increase it's RPMs. Raise the 2 points on the left to 1790. Raise the middle point to 1720 and raise the far right point to 1660.

Step 4: Zone Boost
Now we're going to need access to "Engineer" level options to get everything we need to change under the Profile Settings tab. Go to Options -> Difficulty and select Engineer. Now go to the Profile Settings tab. Don't be alarmed! We only need to change a few of these settings, the vast majority of them can stay at their default values. In fact, the easiest way to make sure things go smoothly is to only change the values I list here. Once you feel more comfortable with the Link, feel free to experiment a little! But for now, we only need to mess with Zone 1 and Cool down settings. So let's scroll down to Zone 1. We're going to create a Zone in the roast that allows the PID to loosen it's control over the RoR. Otherwise, its crash prevention protocol kicks in and with double the thermal energy from all the added bean mass, the roast will take off about half way through and the bean temp will overshoot the intended profile curve. I explain why this works a bit more in the video. These are the numbers you'll need to enter:
- Zone 1 time start: 4:30
- Zone 1 time end: 10:00 (up to 12 minutes if you're using an espresso profile)
- Zone 1 boost: -7 (here you have a little room to nudge depending on your coffee. Anaerobic naturals seem to need as much as -10 while conventional washed coffees seem to do fine at -5. -7 is a safe choice from what I've tested)

Step 5: Cool Down
Finally, we need to tweak our cool down settings, otherwise with that much bean mass, we'll be spraying beans up into the chaff collector early in the cooldown.
- cooldown hi speed: 16600
- cooldown lo speed: 17500
- cooldown lo temperature: 250F (assuming you've set your roaster and studio to F rather than C. If you're using celsius, this would be 121C)

Step 6: Save and Send to Roaster
Finally, go to the About This File tab and change the Short Name, Designer and Description. The Short Name is what appears on the roaster. I typically keep the number and profile pack and just add "200g" to the end. Change the designer to you and enter any description you like. Now click "Save to Roaster" in the bottom right hand corner of the Screen. Be sure to save it in your Sync Folder under Profiles.

Step 7: Pour the beans without spilling them everywhere
One last thing to note that you'll discover if you try roasting 200g in the Link: if you simply remove the top of the roaster at the end of the roast to pour out the beans, beans in the upper portion of the chamber will just spill everywhere. I demonstrate how I empty the chamber mess free in the video, but I'll try my best to describe it here as well. Place your sample tray in front of the roaster. With one hand on the top and the other hand on the body of the roaster, tilt the two parts down towards the tray while holding them together. Once it looks like you're well over the tray and close to it, use the hand holding the top to separate the two pieces. If your aim is true, the beans held in the top of the chamber should fall into the tray! Now set the top down on your table and use both hands to pick up the roaster base and pour the remainder of your beans out. Go slow and steady and you shouldn't have a mess.
And that's it! So far I've had success with this conversion across multiple coffees, roast profiles and profile packs, but I'm sure with more testing and feedback from other Link users, I'll get it dialed in even more. So check back here from time to time for any updates! For now, here are 4 examples of coffees I tested (along with many more) to give you an example of the results I got using this method.
A quick note about our roast level analysis. SCA roast levels range from 150 (super light) to 25 (super dark) with a 60 being a full medium. A difference of 1 or 2 between samples is negligible for our purposes, especially since this roast level analyzer (the LeBrew RoastSee C1) has a margin of error of +/- 1.