How to Roast Coffee with a Whirley-Pop
Roasting your own coffee at home is much easier and less expensive than you might think. Lots of folks think you need lots of expensive equipment and tons of time and experience to roast your own coffee at home. Well, I'm here to put that myth to rest. It's easy, inexpensive and fast. Here we're going to focus on one of my favorite and least expensive ways to roast coffee at home: The Whirley-Pop.
DIY Coffee Roasting
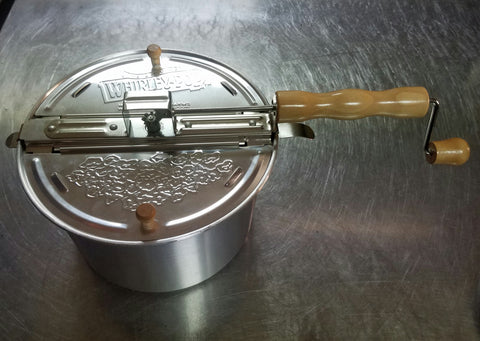
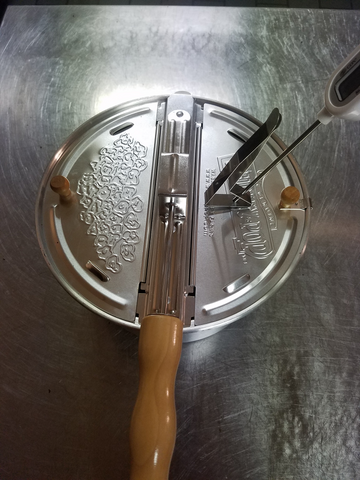
The Whirley-Pop is the DIY'ers dream. Completely manual, no electricity required operation so you can roast on your stove top at home, over a camp stove or on a propane grill. Simple, easy to use and CHEAP. For this tutorial, we picked up the original Whirley-Pop made by Wabash Valley Farms on Amazon for under $25. These are made of aluminum but are surprisingly robust little roasters that can provide you many years of roasting pleasure. PLEASE NOTE: Roasting coffee in a Whirley-Pop is entirely safe (if common sense is used of course) but it is not the manufacturer's intended purpose for the machine, therefore, roasting coffee in a Whirley-Pop will void it's warranty. But who cares?! You can easily repair these things and a brand spanking new one is only $25.
Simple Yet Effective
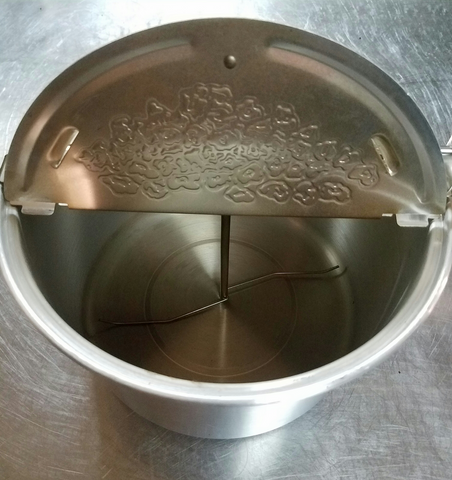
Operation of a Whirley-Pop is extremely simple. Just place the Whirley-Pop over a heat source (direct flame such as from a gas range or propane camp stove works best, though you can have success on an electric stove) and gently crank the handle until your roast is done! The handle turns two tines that agitate the beans which helps them roast evenly. The whole process takes 7-10 minutes, depending on the desired roast level. That may sound like a long time to crank a handle, but we had absolutely no trouble keeping it going the whole time. I'd say we could handle 2 or 3 roasts in a row before wearing out, that's how easy the operation is. You can also roast 1/2 lb to a whole pound of coffee at a time, though we had the most consistent results experimenting with 1/2 pound batches.
Trick out your Whirley-Pop
There are lots of ways you can personally modify your Whirley-Pop for more home roasting geekery! The most common modification is to add a thermometer, which we decided to do to ours. We simply drilled a small hole into the lid, just big enough for the probe, inserted the probe and used a clip to keep the whole thing in place. While not necessary for great coffee, we enjoyed the added information and it was a simple operation.
Is the Whirley-Pop for you?
There are a few drawbacks to using the Whirley-Pop over electric powered methods. One is that you obviously can't really step away (although you should never really step away from a roaster in operation anyways, nobody wants to start a fire!). Also, there's a learning curve with handling all the variables at play here that an electric method would mostly take care of for you such as how high to set your flames/heat source, how quickly to crank the handle, etc. The Whirley-Pop is for people who really enjoy DIY and who want the most basic approach to coffee roasting, so if you'd rather just turn on a machine and watch the magic happen, you'd probably prefer another method. But if you enjoy manual, old-school mechanics and like playing with all the different variables in roasting, you're gonna dig the Whirley-Pop.
What You'll Need
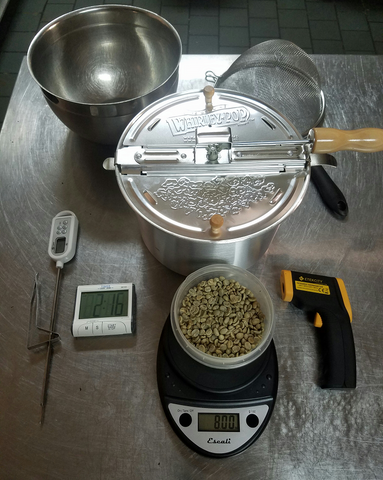
- A Whirley-Pop
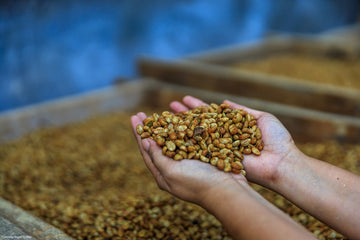
- 8 ounces of green coffee
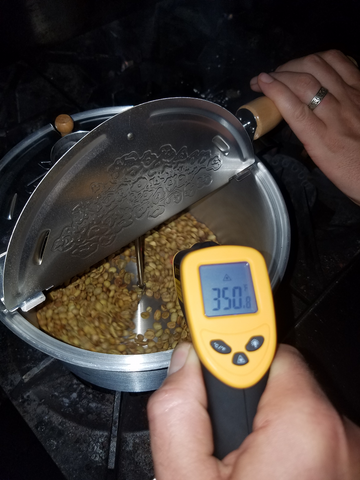
- A thermometer (optional). We actually used our Infrared Thermometer for most of the process, you can pick up a decent one on Amazon for under $20.
- A couple of colanders or bowls for cooling.
- A timer. A kitchen timer is best but you can always use the one on your phone!
Give it a Whirl!
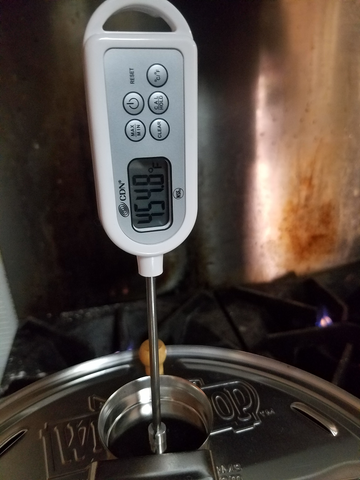
1. Pre-heat your Whirley-Pop to ~450 degrees Fahrenheit. We used a regular temperature probe to measure the heat inside and double checked with our Infrared Thermometer.
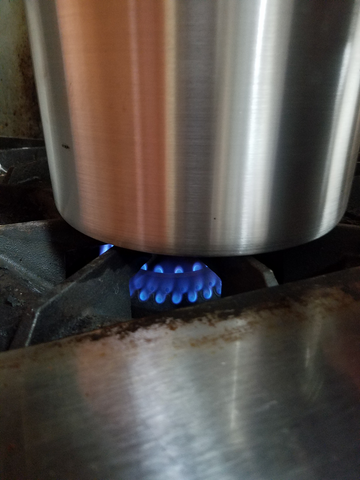
2. Adjust your heat source until the temperature stabilizes right around ~450. We had the best results with a surprisingly low flame (on an electric stove, this would be considered Medium-Low heat). Add your green coffee and begin gently stirring. No need to go crazy here, we just kept a steady pace. Begin the timer to keep on eye on your progress.

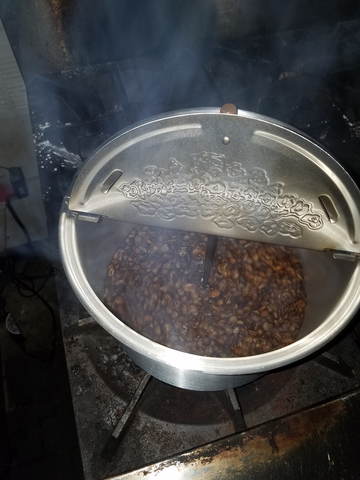
3. After a few minutes and around 250-300 degrees, the beans should start to turn from green to light brown and begin emitting a grassy, hay smell. Soon you should begin to see steam escaping as water evaporates. Try to keep the lid closed as much as possible, just open it for quick peeks to check your progress.
4. Eventually you should begin to see the steam turn smokey and hear the first crack beginning. This should happen between 5 and 7 minutes into the roast and between 350-370 degrees.
5. As the first crack is beginning to slow down at ~415 degrees, your coffee should be around City roast (light). Check our Roast Levels guide for more on where to stop your roast.
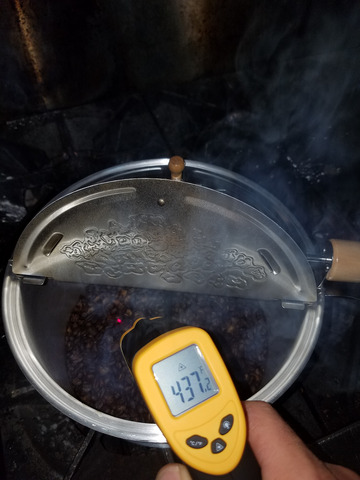
6. At ~430-440 degrees and just a little ways into second crack you've got yourself a Full City to Full City Plus roast (Medium to just a ways into Medium-dark), which is were we decided to pull this Guatemala Huehuetenango. You can certainly take your roast darker, but be aware that there will be significant smoke involved, so turn on your range fan if you're roasting indoors!

7. Immediately pour your beans into a bowl or colander and begin pouring them back and forth between two bowls or colanders to cool the beans. At this point, the chaff should separate easily and flutter off, so we recommend doing this step outside to keep clean up simple.
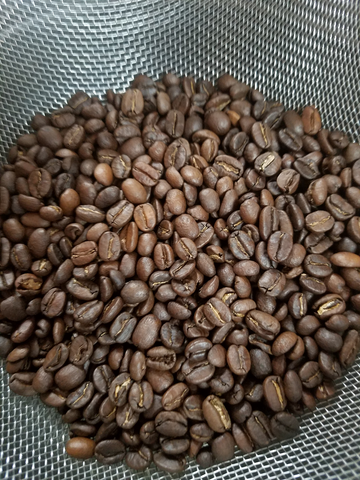
8. All done! Store your beans in a valve bag or air tight container in a cool, dry place away from light. Allow your beans to rest 12-24 hours before brewing for optimal results.
The Bottom Line
And there you have it. In ~10 minutes, you've got fresh roasted coffee. We were amazed with how consistent and even the results were and how well the coffee cupped the next morning. Since the Whirley-Pop requires a longer roast time than some home roasting methods, it provides more of a drum roaster profile: rounded and smooth with lower acidity. But the best part has to be the bottom line. Assuming you already have a couple bowls for cooling and a timer, all you need to buy to get started is the Whirley-Pop itself for ~$25.
Feel like getting fancy? You can pick up an Escali Scale for ~$25 and the Elekcity IR Thermometer for ~$15, both on Amazon. Grand total to start home roasting your own coffee with this simple set up? $65.