Pour Over Primer
In-Depth Beginner's Guide to Pour Overs ft. Bee House Dripper
The Recipe used in the video is:
Ingredients:
- 32g coffee (about 3 rounded tablespoons)
- 500g Water 204 degrees F (17 ounces)
- Melitta #4 filter
Directions
- Grind coffee medium fine (~4.5/10)
- Fold filter along finished edges and place in Bee House
- Place Bee House on top of mug or decanter
- Rinse filter and discard rinse water
- Add coffee to Bee House and shake to level
- Bloom with 65g water (twice as much water as coffee)
- At 30 seconds, add water to 250g (fill brewer to top)
- Spin/Swirl gently to re-level coffee
- Once you can see the coffee bed, add remaining 250g water
- Spin/Swirl again once it's safe to do so
- Full brew time should be ~3:30
Here's a transcript of the first and longest part of the Video:
Part 1: Pour Over basics - So let’s clear up something first. Pour over brewing is just another way of saying manual drip brewing. This is in contrast to automatic drip brewing where a machine heats and adds the water to the coffee for you. So with manual drip brewing, you’re the coffee machine!
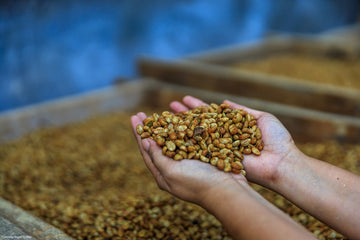
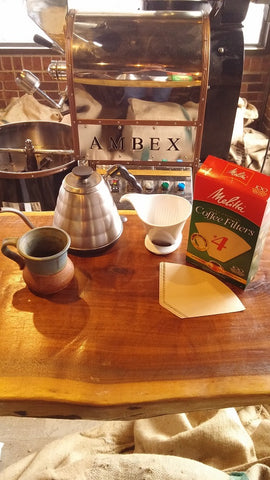
- Equipment - Ok, let’s go over all the equipment you’ll need. Most importantly, coffee! Next, you’ll need hot water, we recommend a water kettle that has a temperature setting, but any old tea kettle will do fine. Also, you’ll need a grinder, in this case, either electric or manual will do the trick. You’ll want a timer which can be a kitchen timer or just the stopwatch on your smartphone. Also, make sure you have the appropriate filters for your pour over (melitta filters are perfect for the Bee House). Next, while not required, you’ll ideally want to have a scale since it helps making measurements precise. Finally, you’ll need a mug or decanter to brew into. Aaaand that’s it!
- Water temperature - This one’s pretty straightforward. The gold standard from brew water temperature is between 195 and 205 degrees F. Hotter water usually highlights brightness and fruit forward sweetness while cooler water tends to bring out body and mouthfeel. We recommend water in the 203 to 205 range for fruity naturals and 198-202 degree water for fully washed coffees.
- Coffee amount - Once again, this one is pretty simple. The recommended ratio for drip brewing is 1 part coffee to 15 to 17 parts water. If you prefer your coffee stronger, go with a 1 to 15 ratio. Less strong would be 1 to 17 and our happy medium recommendation is 1 to 16. To figure out how much coffee you need, simply take the brew amount you want, say 300 g (which is about 10 ounces) and simply divide that number by 16. So in that case we would need 19 g of coffee.
- Bloom - Next we’re going to talk about the big steps involved in manual drip brewing. The first is the bloom. This is where we initially add our hot water to the ground coffee. This step is very important as it allows the fresh coffee to release or off gas any remaining CO2 left over in the beans from the roasting process. CO2 when dissolved in water has a very sour flavor and we want to let that release out of the coffee before really brewing. Now for some controversy. There are several different schools of thought concerning bloom techniques. One is that you simply pour your hot water onto the grounds and allow gravity and the turbulence caused by off gasing to fully saturate all the grounds. Fully saturating all the grounds is really important to consistent brewing and not over or under extracting your coffee. Another group of folks believes it's necessary to gently stir your bloom in order to ensure complete saturation of the coffee. Then there’s a group somewhere in the middle who believes stirring goes too far and you should instead spin or swirl the bloom in order to fully saturate the grounds. Well, at the end of the day, for us it’s all about consistency and repeatability which means making your variables as controlled as possible. We think for beginners, the simplest method is the first, so pour your water in gently and evenly and let nature do the rest. Once you feel more comfortable, feel free to experiment and decide which method you prefer best! One final note on the bloom, a common question is how much water should be used at this stage? A good rule of thumb is twice as much water as coffee grounds, so if you use 20 g of coffee, bloom with about 40 g of water.
- Pour Techniques - Next let’s talk about how to pour your water. Wait, let’s back up, first we should talk about what you pour your water with! A water kettle with a gooseneck is widely preferred since it allows for easy control of how fast or slow the water is added as well as giving you better control of direction and where water is added. That being said, the bee house is extremely forgiving of those two things and any old tea or hot water kettle will work fine if it’s all you have on hand. So, moving on, as with the bloom, there are several schools of thought about how you should add your water to the coffee post bloom. The “all at once” school is the simplest, in that, you can simply fill your pour over up with water as many times as it takes to achieve your brew volume, usually resulting in one or at most, two pours. Next, there’s the “pulse pour” group, that believes adding the water in small increments, usually in 3 to 4 measured doses, produces a superior cup. For example, you might add 40% of your water post bloom, then after 30 seconds, add 30% of your water, then after another 30 seconds, add the remaining water. There’s yet another group that prefers a bypass or dilution method. This is where you add a percentage of your brew water directly to the mug, then brew into that, usually with 2 or 3 measured and very concentrated pulse pours. Here again, all of these methods have their virtues, but for beginners, there’s just no need to dive into all the complex variables at play here. When brewing with a simple pour over like the bee house, which controls the flow for you, it’s best to stick with something simple, usually 2 big, evenly divided pours. So if our target brew is 500 mL, we’ll add 50% of that, then once it’s nearly drained, the remaining 50% and let the bee house control the pour for us! The other methods discussed here really work better with a large hole brewer such as the Hario v60 as this places an emphasis on controlling the pour perfectly, but we’ll save that for more advanced brewing guides.
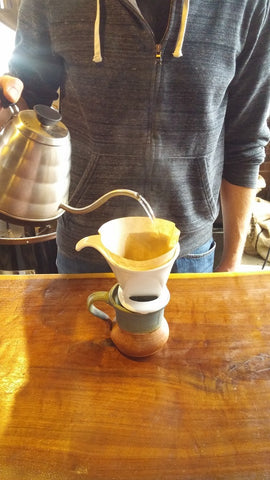
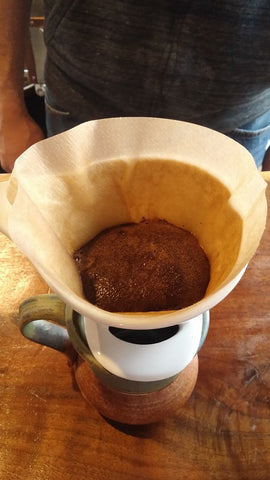
- Drawdown: Once you’ve added all your water, we enter what’s known as the drawdown as the water drains through your coffee and into your mug or decanter. During the early parts of the drawdown, we find it helpful to give your pour over a gentle spin. This technique, made famous by coffee expert Scott Rao and often called the Rao spin, helps to resettle the coffee bed and ensure more even extraction. You’ll know you did it successfully when the drawdown is complete and you can see a nice, fairly level coffee bed as well as very few large grinds stuck to the side of your filter.
- Brew time: Finally, the total brew time is the last big variable. You don’t want it to be too slow, or you’ll over extract bitter and astringent notes from the coffee and you don’t want it to be too fast or you’ll under extract and have sour and flat flavors. Faster brews are generally sweet, clean and bright, while slower brews focus on body and mouthfeel. With the bee house controlling the flow rate for you, you can adjust your brew time by making your grind more coarse or more fine. A good brew with the beehouse should land between 2:30 and 3:30, depending on your brew volume. Start with a medium grind and see if your brew time lands in there. If it’s fast, adjust more and more fine until you begin to taste strong bitter notes, then dial it back just a bit from there. Congratulations, you’ve found your perfect grind!
Another Easy One Serving Recipe
If you haven't tried using a pour over coffee brewer, you're missing out. Pour overs became popular a few years back and have only grown in popularity to the point that some coffee shops will ONLY brew pour over coffee on demand per customer! Pour over brewers (or drippers) produce crisp, clean coffee and give you complete control over all the variables of the brewing process: extraction time, water temperature, pre-wetting, pre-infusion (blooming), etc. What does this mean? Coffee geekery at it's best! If you're new to pour over brewing, if you're new to pour over brewing, here's a super simple recipe you can try to get you started:
prep & setup:
You'll need:
- A pour over brewer/dripper - our favorite is the Bee House
- Hot water - between 195 and 205 degrees F, or just off the boil
- Filters - the Bee House uses #2 or #4 cone filters, we like Melitta filters and they're available most anywhere
- A mug or decanter
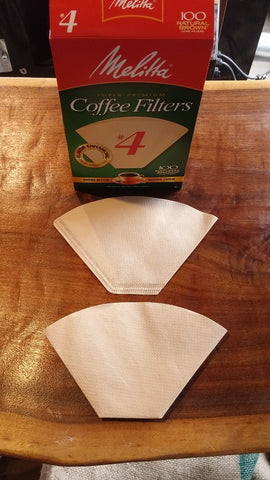
step 1: fold filter edges
Fold the bottom and side of the filter over so that the filter will sit flush inside the brewer (bottom filter in the picture is correct)
step 2: pre-wet & rinse
Place the filter inside the brewer and set the brewer on top of your mug. Then thoroughly rinse the filter with hot water. This rinses any loose paper fibers from the filter getting rid of any possible paper flavor and pre-warms your mug. Dump hot water from your mug before brewing.
step 3: add coffee
Add 20 grams (about 2 rounded tablespoons) of medium-fine ground coffee. This is ground just a bit finer than you would for normal drip coffee, but you can experiment with the fineness of your grind for optimal extraction time. Gently shake the brewer to settle coffee evenly.

step 4: Bloom (pre-infusion)
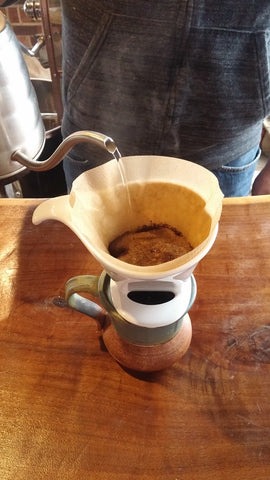
Pour enough coffee over your grounds to thoroughly wet the coffee. Use about twice as much water as coffee. Pour directly on the coffee and not down the sides of the filter, as this will cause channeling (which is the fancy word for giving water a place to flow where it won't extract enough coffee before it leaves the brewer). If your coffee is nice and fresh, you should see some bubbling as the coffee begins to release gasses. Allow the coffee to bloom for 30 seconds.
step 5: brew!
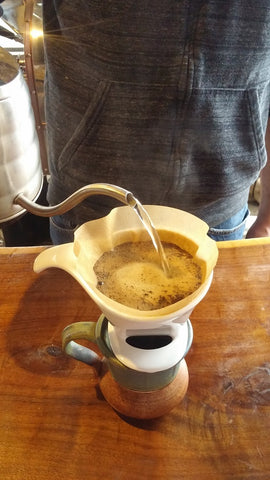
It's finally time! Gently fill your brewer to the top. There are many methods of pouring, we like to pour in a slow, gently circle over the grounds. Once again, ensure you are pouring onto the grounds and not down the sides of the brewer/filter. It should take approximately 2-3 minutes for the water to drain into your mug. If this goes to fast, make your grind a bit more fine, if the coffee extracts too slowly, make your grind a bit more coarse. There's lots of room here to experiment!
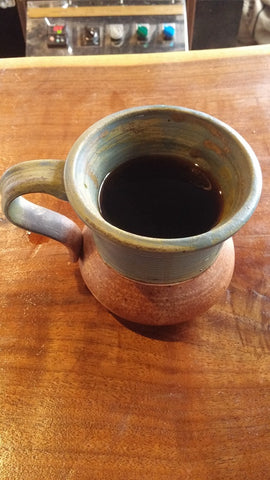
step 6: drink!
It's time to enjoy the fruits of your labor! The Bee House dripper (as well as most pour over brewers) makes about 10 ounces of coffee each time. Clean up is simple, just toss the filter with the used coffee and rinse/wash the brewer.